Creating Storage Connections
Storage Connections enable AI applications to access your Amazon S3 buckets through Vendia MCP Gateway. This guide covers the complete setup process, including AWS IAM configuration and creating storage connections in the Vendia platform.
Prerequisites
Before creating Storage Connections, ensure you have:
-
AWS IAM Role: A role with appropriate permissions for the S3 buckets you want to access
-
S3 Bucket Access: Access to the S3 bucket(s) you want to use through AI applications. If you do not have an S3 bucket or AWS account, see How to Create an AWS S3 Bucket for step-by-step instructions.
-
Vendia Account Permissions: Permissions to configure Storage Connections in your Vendia account
Step 1: Start Storage Connection Configuration in Vendia
Start the configuration process in Vendia to obtain the required AWS account numbers:
-
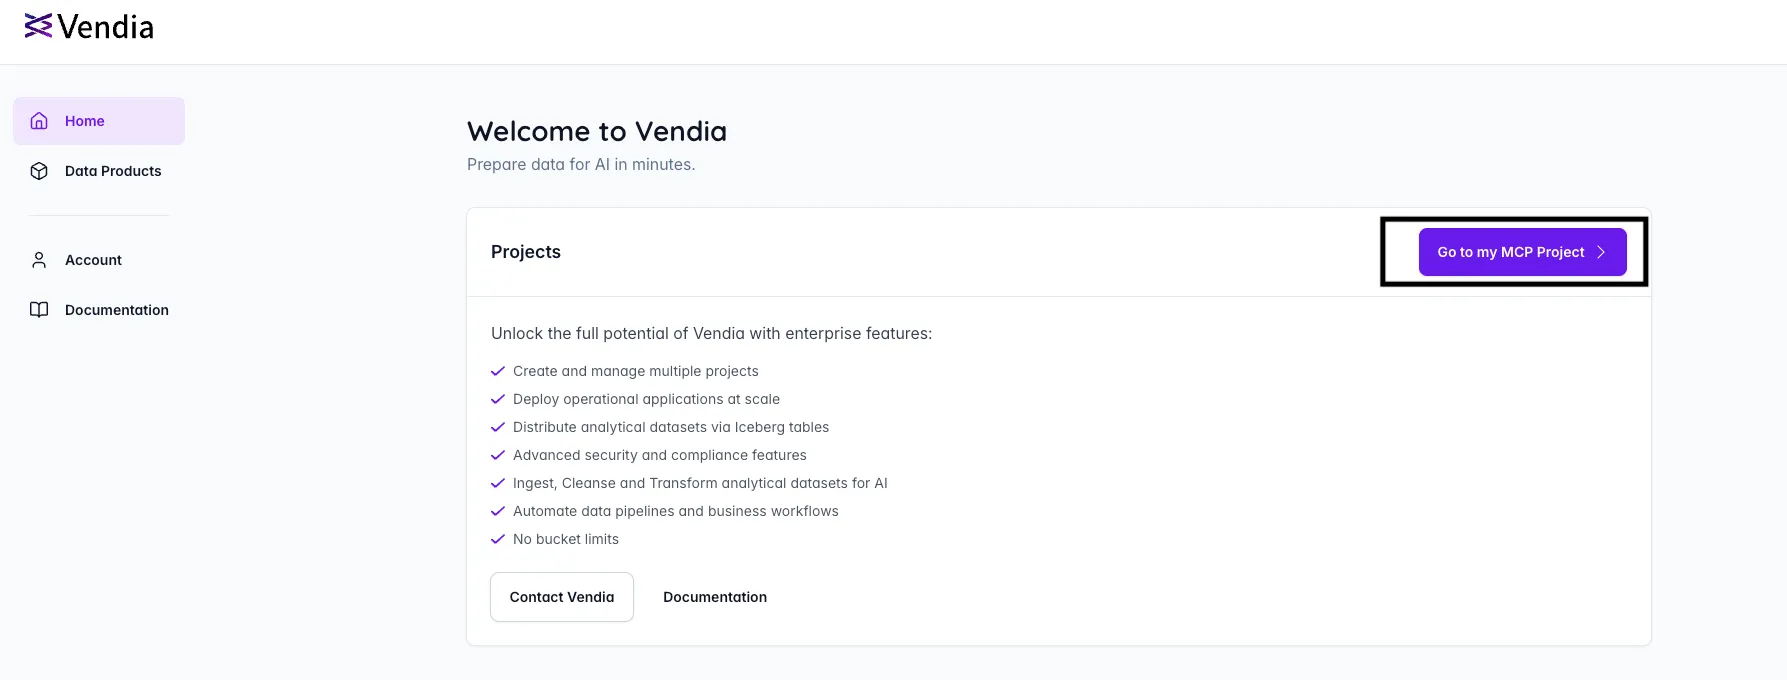
In your Vendia dashboard, click Go to my MCP Project.
-
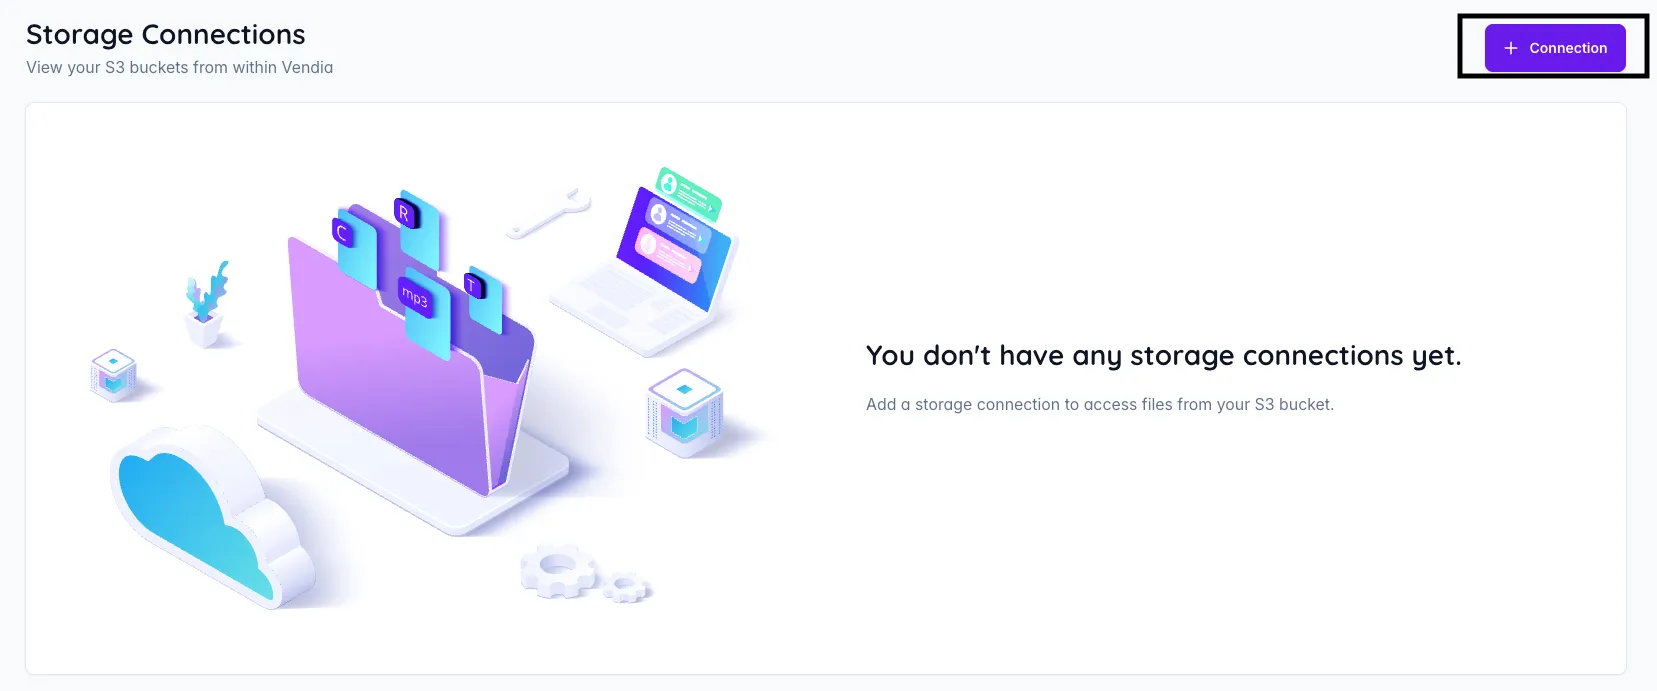
Go to Storage Connections.
-
Click the + Connection button.
-
Note the Vendia AWS account numbers displayed in the UI — you will need these to configure the IAM trust relationship.

Step 2: Configure IAM Trust Relationship
Using the account numbers from Step 1, configure the AWS IAM role that Vendia will assume to access your S3 bucket(s).
Grant Vendia access to your S3 bucket by adding a trust relationship to your IAM role:
-
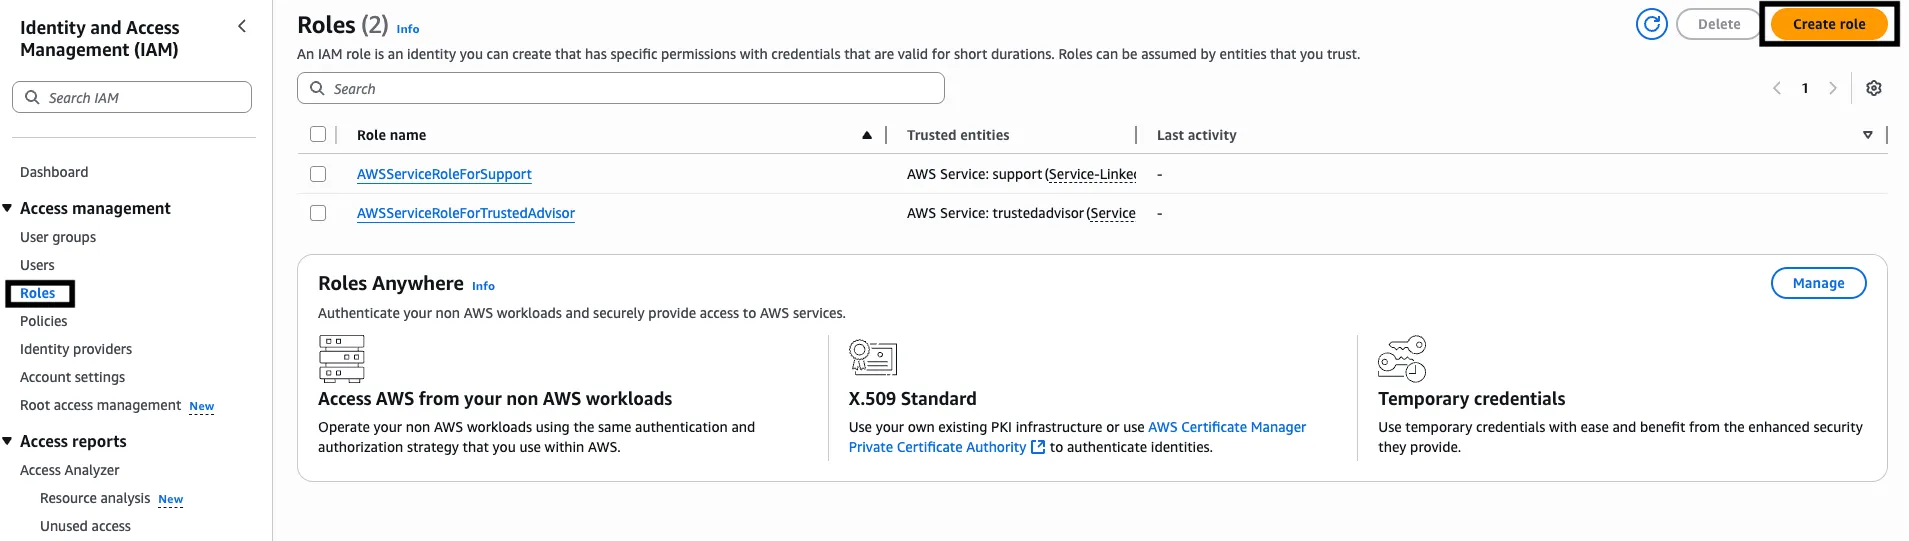
Go to the AWS IAM dashboard (click All Services > IAM).
-
In the left navigation, click Roles. On the Roles page, either select an existing role or create a new role, then follow these steps:
-
Click Create role.
-
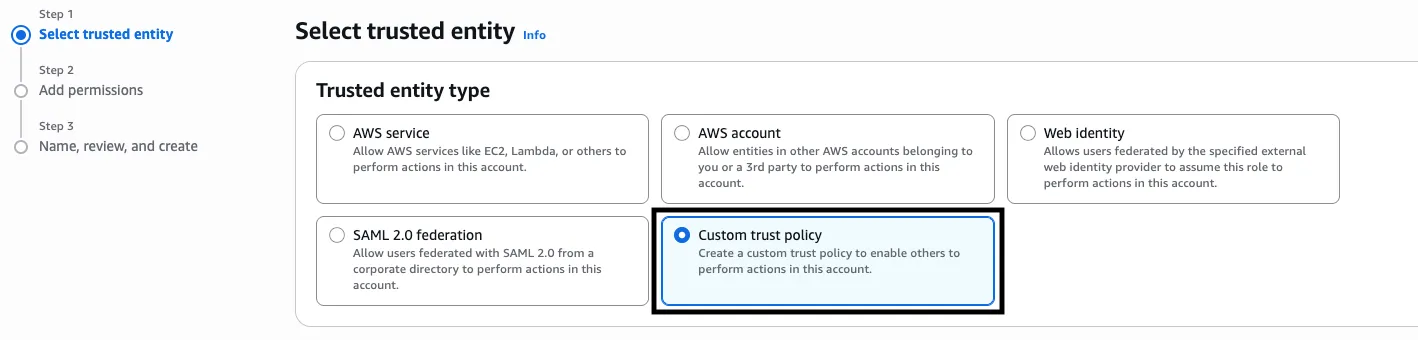
Under Select trusted entity, select Custom trust policy.
-
Under Custom trust policy, add or merge the trust relationship by copy-pasting the policy shown below.
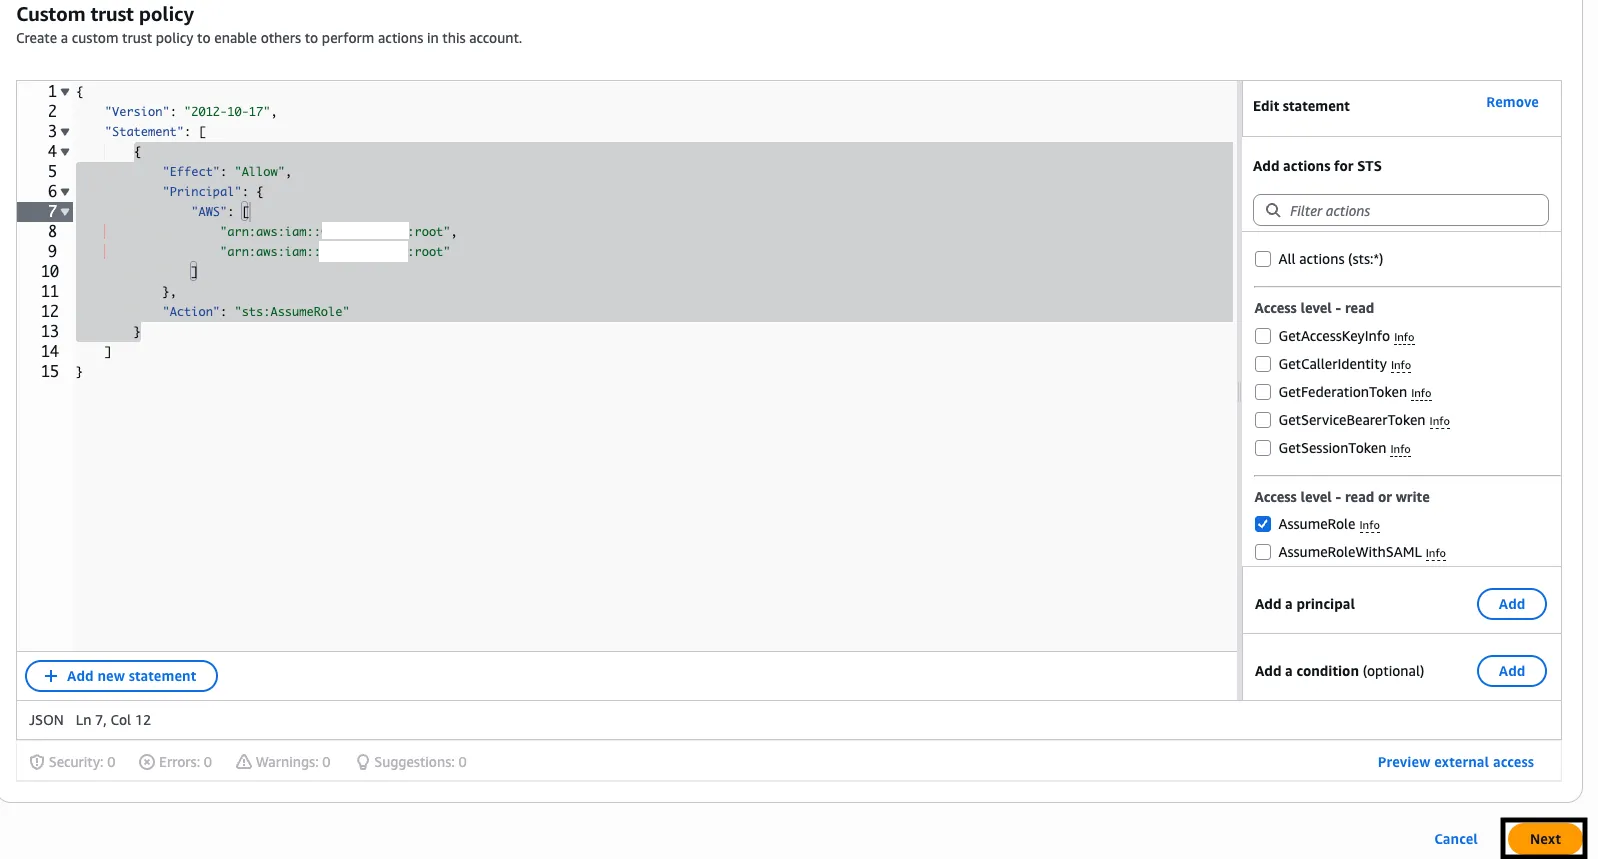 {"Version": "2012-10-17","Statement": [{"Effect": "Allow","Principal": {"AWS": ["arn:aws:iam::VENDIA_ACCOUNT_ID1:root","arn:aws:iam::VENDIA_ACCOUNT_ID2:root"]},"Action": "sts:AssumeRole"}]}
 -
Click Next.
-
On the Add permissions step, click Next.
-
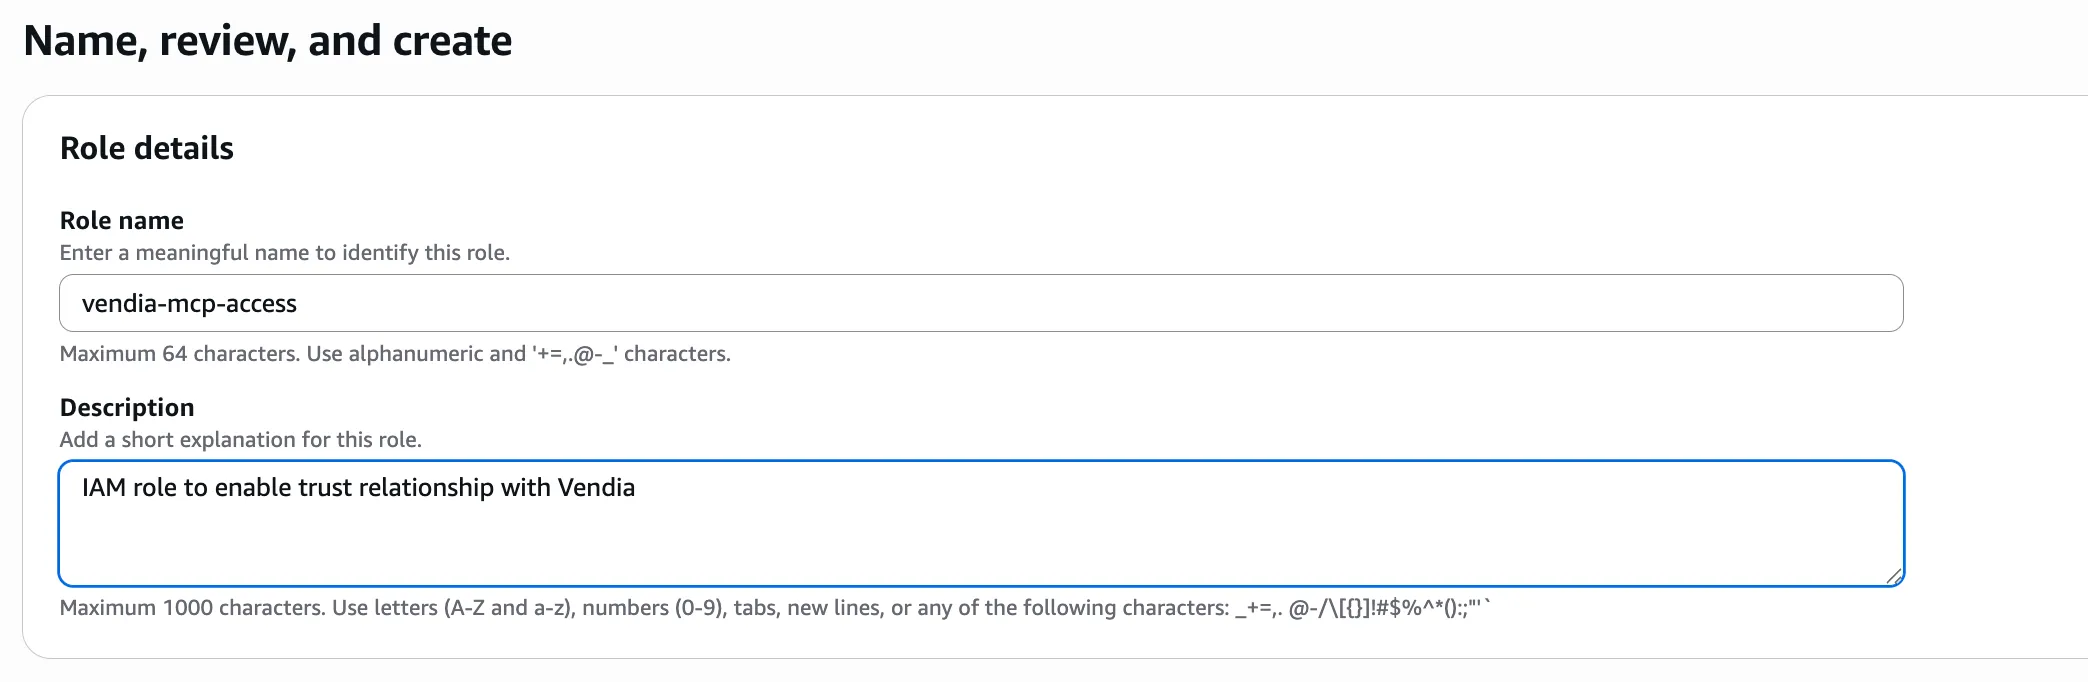
On the Name, review and create step, enter the role name (e.g., vendia-mcp-access) and add a description.
-
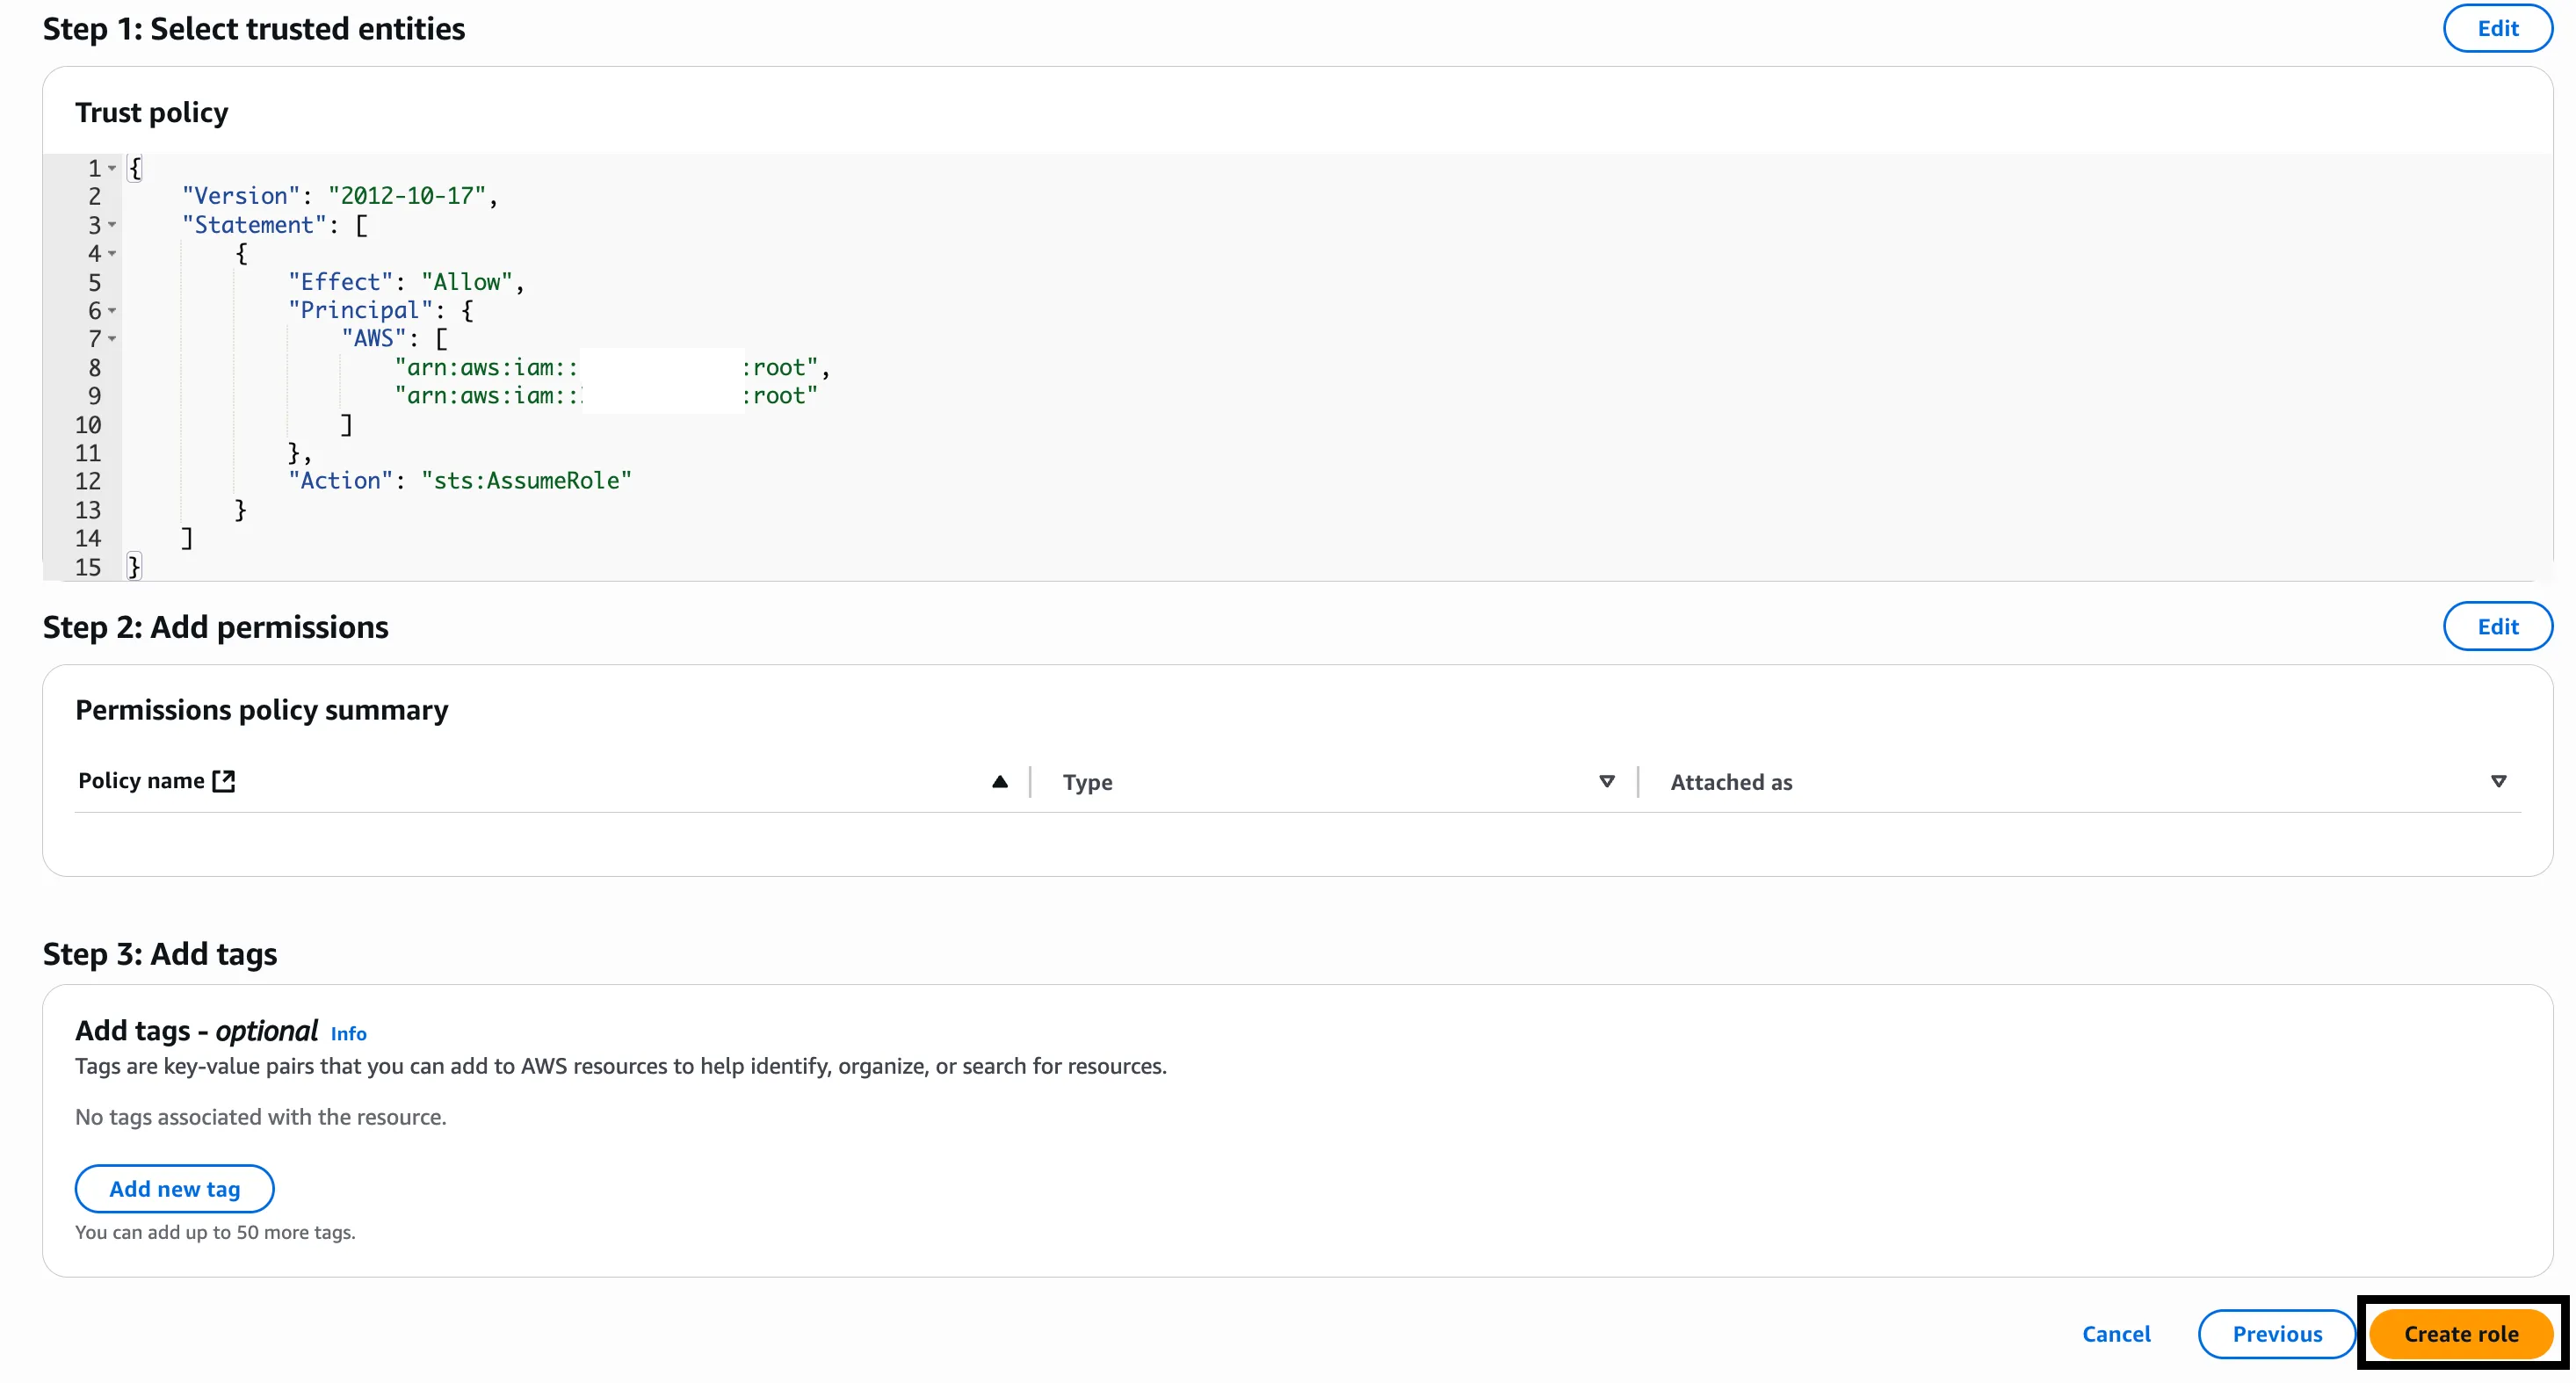
Review your trusted entities and click Create role.
Step 3: Configure IAM Permissions
Choose the appropriate permission set based on your intended use case:
-
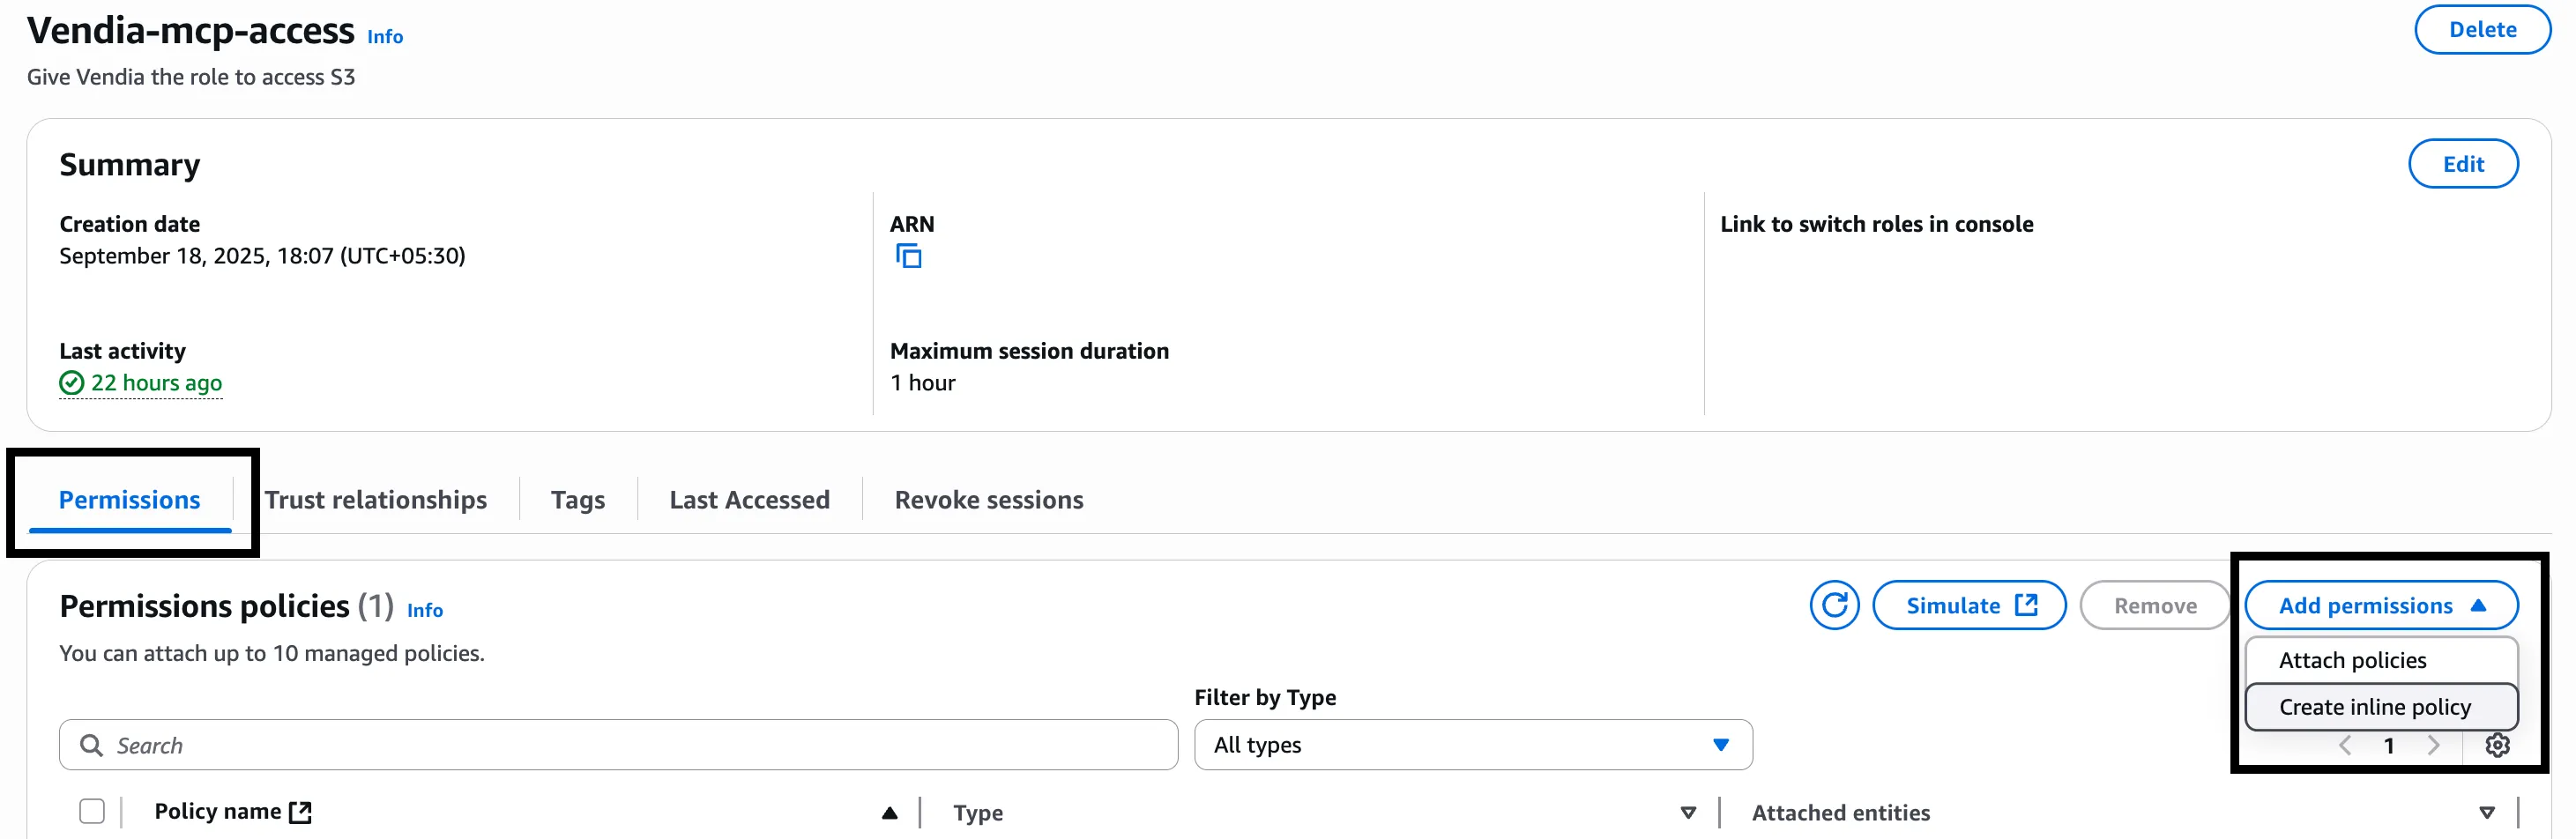
Click the Permissions tab for the selected IAM role.
-
Click Add permissions and then click Create inline policy.
-
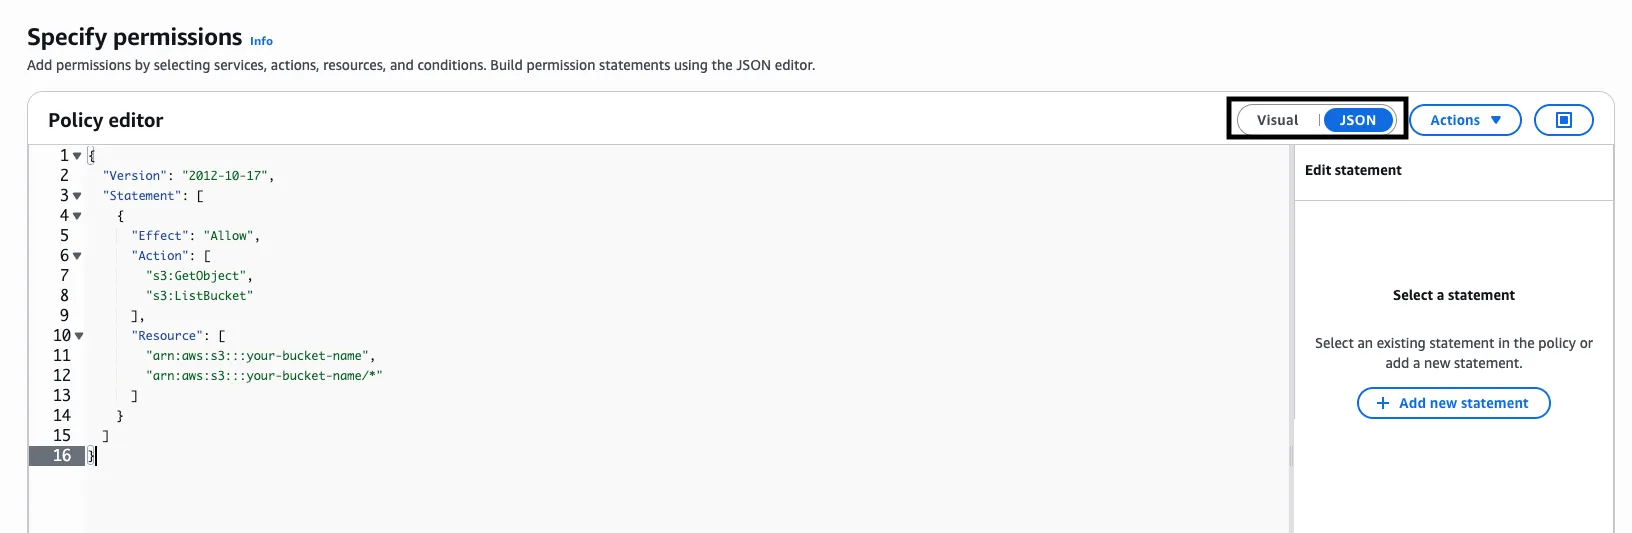
On the Specify permissions page, you can either select Visual or JSON in the policy editor.
For most users, we recommend using the JSON editor for precise control and security. See below for JSON policy examples and instructions.
If you prefer the visual editor, see Visual IAM Policy Editor Guide.
Choose one of the following policy approaches based on your needs:
Option A: Read-Only Access (Full Bucket)
{ "Version": "2012-10-17", "Statement": [ { "Effect": "Allow", "Action": ["s3:GetObject", "s3:ListBucket"], "Resource": ["arn:aws:s3:::my-s3-bucket", "arn:aws:s3:::my-s3-bucket/*"] } ]}Option B: Read and Write Access (Full Bucket)
{ "Version": "2012-10-17", "Statement": [ { "Effect": "Allow", "Action": ["s3:GetObject", "s3:ListBucket", "s3:PutObject"], "Resource": ["arn:aws:s3:::my-s3-bucket", "arn:aws:s3:::my-s3-bucket/*"] } ]}Option C: Complete Access (Read, Write, and Delete - Full Bucket)
{ "Version": "2012-10-17", "Statement": [ { "Effect": "Allow", "Action": [ "s3:GetObject", "s3:ListBucket", "s3:PutObject", "s3:DeleteObject" ], "Resource": ["arn:aws:s3:::my-s3-bucket", "arn:aws:s3:::my-s3-bucket/*"] } ]}Option D: Segregated Directories (Recommended for Enhanced Security)
Replace my-s3-bucket, my-read-folder, my-write-folder, and my-temp-folder with your actual bucket and folder names.
{ "Version": "2012-10-17", "Statement": [ { "Effect": "Allow", "Action": ["s3:ListBucket"], "Resource": "arn:aws:s3:::my-s3-bucket" }, { "Sid": "AllowReadFromSpecificFolder", "Effect": "Allow", "Action": ["s3:GetObject"], "Resource": "arn:aws:s3:::my-s3-bucket/my-read-folder/*" }, { "Sid": "AllowWriteToSpecificFolder", "Effect": "Allow", "Action": ["s3:PutObject"], "Resource": "arn:aws:s3:::my-s3-bucket/my-write-folder/*" }, { "Sid": "AllowDeleteInSpecificFolder", "Effect": "Allow", "Action": ["s3:DeleteObject"], "Resource": "arn:aws:s3:::my-s3-bucket/my-temp-folder/*" } ]}Copy-paste your chosen policy into the editor and click Next.
-
On the Review and create step, enter the policy name (e.g., vendia-mcp-s3-policy) and review the permissions.

-
Click Create policy to finish.
Visual Policy Editor Option
For step-by-step instructions using the AWS visual policy editor (for read and write access), see Visual IAM Policy Editor Guide.
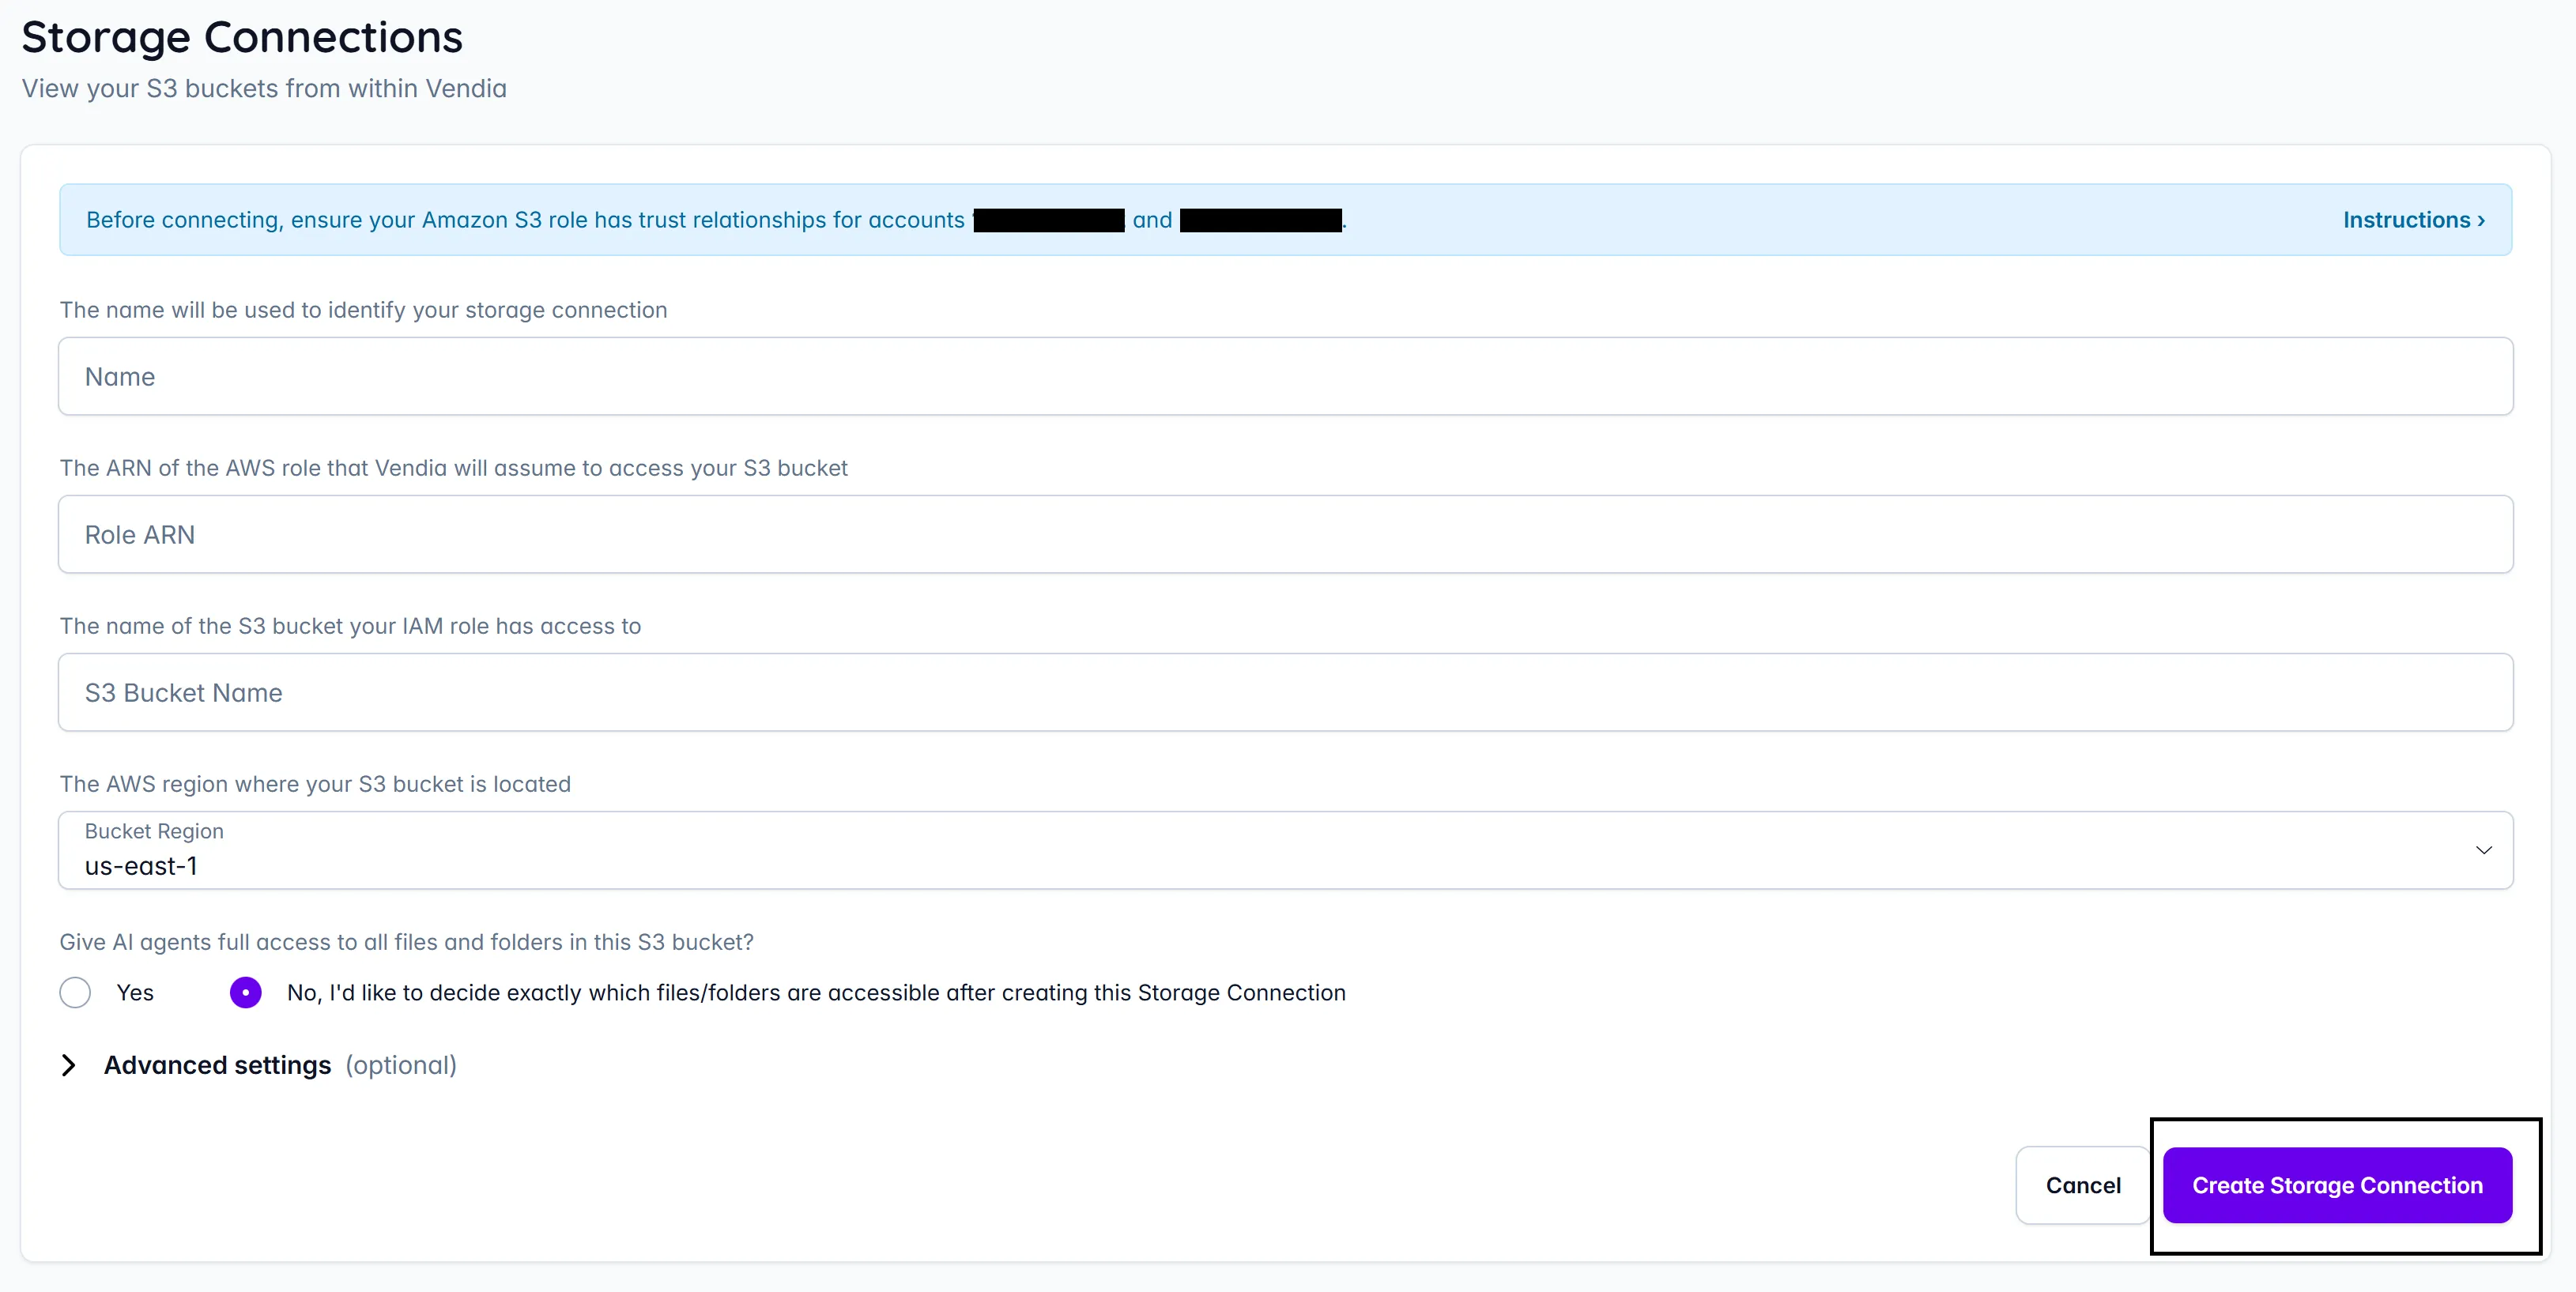
Step 4: Complete Storage Connection Configuration in Vendia
Return to Storage Connections in the Vendia dashboard to complete the configuration:
-
Provide the following information in the Storage Connection configuration dialog (from Step 1):
-
Name: A friendly name to identify this storage connection configuration
-
Role ARN: The ARN of the AWS role that Vendia will assume (configured in Step 2 and Step 3; you can copy-paste it from the role information page in the IAM dashboard)

-
S3 Bucket Name: The name of the S3 bucket you want to access
-
Bucket Region: The AWS region where your S3 bucket is located (create your bucket in a region that is supported by Vendia)
-
-
Configure Access Policies:
You’ll be asked: “Give AI agents full access to all files and folders in this S3 bucket?”
- Select Yes to grant AI agents full access (all actions) to all files and folders in the bucket
- Select No, I’d like to decide exactly which files/folders are accessible after creating this Storage Connection to configure specific access policies after creation, allowing you to control exactly which files and folders AI agents can access and what operations they can perform
-
Advanced Settings (Optional):
Expand the “Advanced settings” section if you need to configure client-side encryption:
- Encryption Key (Optional): The encryption master key if using client-side encryption
-
Click Create Storage Connection to complete the setup:
 You will see your newly created Storage Connection in the list:

-
If you selected No in step 2 above, configure access policies now:
- Navigate to the Access Policy tab of your newly created Storage Connection
- Click + Add Path to define which files and folders AI agents can access
- See Access Policies for detailed instructions on how to specify which files and folders are accessible, set granular permissions, and manage AI agent access to your S3 bucket.
Using Your Storage Connection
After configuration, you can:
-
View S3 file metadata from within Vendia: Browse your connected S3 bucket and see file names, sizes, last modified timestamps, and file types directly in the Vendia interface
-
Enable AI Application Access: Allow MCP-compatible AI applications to access files in your connected S3 buckets
-
Manage access configurations: Modify or delete storage connection configurations as needed
Need Help?
If you encounter issues during setup or have questions about creating Storage Connections:
Free Tier Support
- Review the MCP Free Tier FAQ for Free Tier-specific questions
- Submit questions via our contact form (online support only)
Enterprise Tier Support
- Review our MCP Server FAQ for common questions
- Contact Vendia Support for technical assistance